TL;DR
Moving your rig into a closet drastically cuts noise and reflections, but ventilation and placement are key. Combining soundproofing basics with smart positioning makes even tiny spaces workable for high-quality audio.
Ever tried recording in a tiny closet and wondered why it sounds so echoey or why your neighbors complain?
The secret isn’t just about stuffing foam panels everywhere — it’s about where and how you set up your equipment to *manage* sound, not just absorb it. Moving your rig into a closet can turn a noisy, echo-prone space into a quiet, controlled environment. But it’s not magic — success hinges on good placement, layered sound control, and smart ventilation.
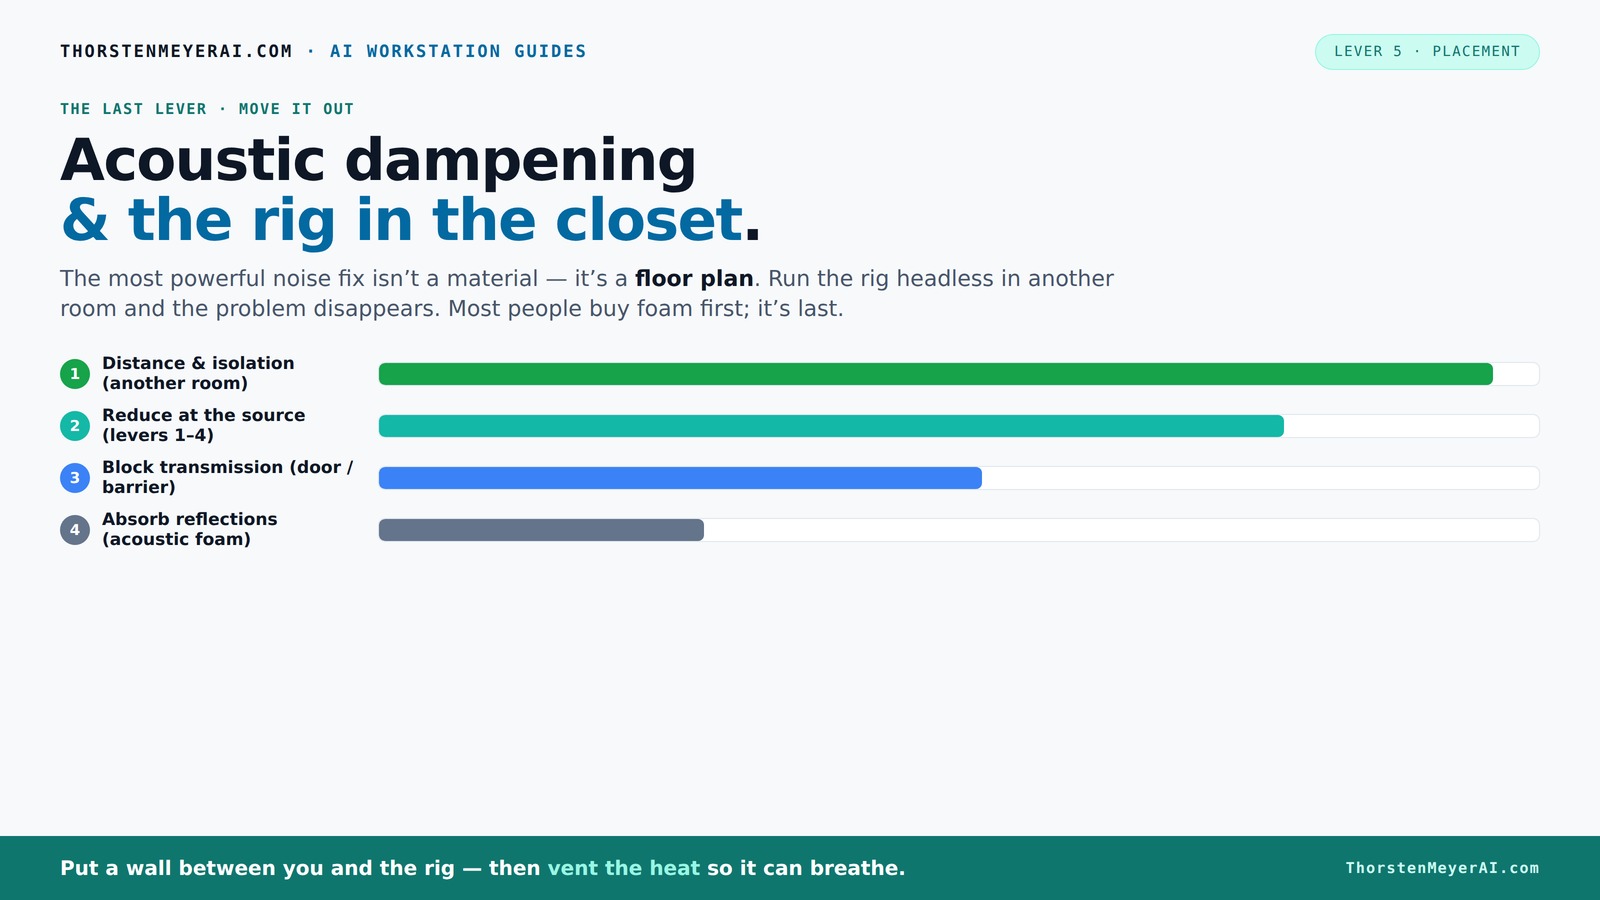
Acoustic dampening
& the rig in the closet.
The most powerful noise fix isn’t a material — it’s a floor plan. A rig you can’t hear because it’s in another room beats any amount of foam. Tap the approaches in Part 1 to see what actually works.
(another room)
(levers 1–4)
(door / barrier)
(acoustic foam)
Contain the noise, not the heat
Key Takeaways
- Moving your rig into another room or closet can cut noise by more than 50 dB, often making additional treatment unnecessary.
- Ventilation is critical in closet setups — sealed spaces trap heat, which can damage equipment or cause noise from cooling fans to increase.
- Targeted acoustic treatment at reflection points and corners provides the best results without overdoing it.
- Sealing gaps around doors and outlets is one of the cheapest, most effective ways to improve sound isolation.
- Choosing a directional mic and placing it close to your mouth minimizes room noise and reflections, boosting voice clarity.

Focusound 52 Pack Acoustic Foam Panels 1" x 12" x 12" Sound Proof Foam Panles Soundproofing Noise Cancelling Wedge Panels for Home Office Recoding Studio with 300PCS Double-Side Adhesive
- Soundproofing Design: Triangular grooves for noise absorption
- Includes Adhesive Tape: 300pcs double-sided adhesive for easy installation
- Easy Shape Recovery: Reforms after soaking in water
As an affiliate, we earn on qualifying purchases.
As an affiliate, we earn on qualifying purchases.
Why Moving Your Rig Can Be the Best Noise Solution
Moving your high-noise rig into a closet isn’t just about hiding the sound from your ears. It’s about drastically reducing what others hear — sometimes by more than half. When you keep the rig in another room or a closet, you prevent noise from traveling through walls and floors. This is especially true for AI workstations, which can push out 600W or more of heat and noise.
Imagine your GPU tower roaring in a closet while your desk stays silent. Your voice or music record cleaner, your neighbors happier. The key is a wired connection and proper ventilation, because a sealed closet traps heat. So, this approach isn’t just about quiet; it’s about smart, safe placement.
Why does this matter? Because reducing noise at the source minimizes the need for extensive soundproofing, saving time and money. However, it also introduces challenges: heat buildup and ventilation become critical. Without proper airflow, your equipment could overheat, leading to hardware failure or noisy cooling fans that negate the benefits of the setup. This tradeoff underscores the importance of thoughtful planning when relocating a rig to a closet environment.
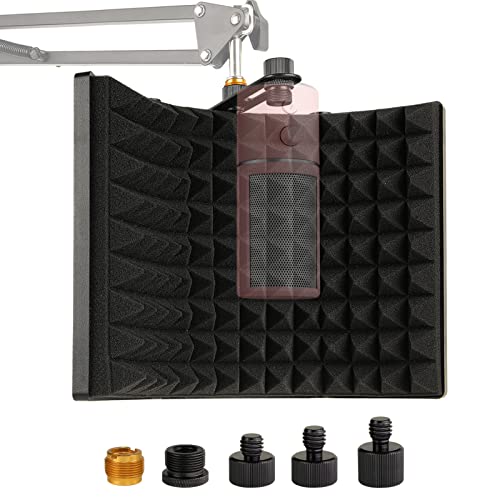
Microphone Isolation Shield, Foldable 3-Panel Sound Absorbing Foam for Condenser Mic, High Density Acoustic Shield with Adapters for Mic Arm Stand -Portable Vocal Booth for Home Recording Studio
- High Density Absorbing Foam: Reduces sound reflection for clarity
- Foldable and Portable Design: Easy to carry and adjust angles
- Versatile Mounting Options: Fits desktop or mic stand use
As an affiliate, we earn on qualifying purchases.
As an affiliate, we earn on qualifying purchases.
The 'Rig in the Closet' Setup — The One Big Catch
Placing a hot, busy machine in a closet sounds perfect — but heat build-up is the biggest risk. A GPU running at 600W dumps heat into a small, enclosed space. Without proper airflow, temperatures skyrocket, fans ramp up, and noise becomes worse. The solution? Ventilation and airflow management.
Use passive vents, or better, a quiet exhaust fan to pull hot air out. For serious setups, professional soundproof cabinets with ducted airflow and temperature control exist. They keep noise down to about 36 dB while dissipating heat. Remember: a sealed space without ventilation is a recipe for overheating.
Why is this so important? Because excessive heat not only risks hardware damage but also causes cooling fans to spin faster, creating more noise. This counteracts your goal of a quiet environment. Proper ventilation acts as a balancing act: it removes heat efficiently while minimizing sound leakage. Neglecting this can lead to a vicious cycle of overheating and increased noise, defeating the purpose of your closet setup. So, investing in good airflow isn’t just a technical detail — it’s essential for reliability and quiet operation.
Learn more about managing heat and noise in such setups from this guide on reducing heat and noise.

8" Room to Room Fan with Remote, Reversible Through Wall Fan for Quietly Circulating Air, 320 CFM Through the Wall Fan with Temperature Control, Durable Build Quality, In Wall Fan for Closet, Laundry
- Quiet, Powerful Air Circulation: Circulates 320 CFM quietly between rooms
- Remote Control Operation: 33ft-range remote for easy control
- Adjustable Settings: Control speed, airflow, and timer easily
As an affiliate, we earn on qualifying purchases.
As an affiliate, we earn on qualifying purchases.
Soundproofing vs. Acoustic Treatment — What's the Difference?
Soundproofing blocks noise from escaping or entering a space. Think: thick drywall, sealing gaps, dense barriers. Acoustic treatment, on the other hand, improves how sound behaves inside a room. It reduces echo and reflections, making recordings clearer and more natural.
In a closet, both matter. To keep noise in or out, seal cracks and add mass. To make recordings sound better, treat reflection points with panels or blankets. Knowing the difference helps you choose the right fix for your goal.
Understanding this distinction is crucial because it influences your approach. Soundproofing aims for isolation — it prevents sound from leaking out or in, which is essential if you're trying to avoid disturbing others or keep external noise out. Acoustic treatment focuses on internal sound quality, making your recordings clearer by controlling reflections and echoes. Often, a balanced combination yields the best results: sealing gaps for isolation and using strategic panels for sound quality. Over-application of either can lead to diminishing returns or unnatural sound. For example, excessive soundproofing might deaden the room, making recordings sound flat, while insufficient treatment can leave echo and reflections that muddy your audio. Recognizing the purpose behind each method helps you allocate your resources efficiently and achieve a well-rounded, professional sound environment.
For a deep dive, check out soundproofing vs. acoustic treatment.

2 Pack Studio Monitor Isolation Pads for Large Speakers Sound Insulation Studio Foam Prevents Vibrations Acoustic Speaker Isolation Pad High Density Fits Most Stands
- Enhanced Sound Clarity: Reduces vibrations for cleaner sound
- Universal Compatibility: Fits most studio monitors and brands
- Adjustable Angle Design: Allows precise monitor positioning
As an affiliate, we earn on qualifying purchases.
As an affiliate, we earn on qualifying purchases.
Where to Place Acoustic Panels for the Best Results
In a small closet, placement is everything. The first spots to treat are reflection points: the wall behind your mic, the side walls, and the ceiling directly above your head. Use the mirror trick: have someone move a mirror along the wall while you sit at your mic. Wherever you see a reflection into the mic, that’s where panels go.
For voice recording, focus on the wall behind the mic — it prevents echoes from bouncing back into your recording. Side walls catch bounce-back sound, and ceiling panels reduce vertical reflections. Bass traps in corners help control low-end rumble in tight spaces.
Effective placement turns a messy echo chamber into a controlled sound zone. For more tips, see where to place acoustic panels.
Find more on panel placement in acoustic panel placement.
Remember, the goal is to absorb and diffuse sound without deadening the space completely. Over-treating can make your room sound unnatural or too 'dead,' which can affect the naturalness of your recordings. Strategic placement ensures you target the primary reflection points, maintaining clarity while preserving some liveliness in the sound. Adjustments may be needed based on your specific space and equipment, so always listen critically after placing panels.
How Much Treatment Do You Really Need?
Over-treating a closet isn’t necessary — targeted, strategic coverage works better. Experts suggest treating roughly 20–40% of the surface area, focusing on reflection points and corners. Heavy coverage can deaden sound but risks making your space feel unnatural.
But why does this matter? Because excessive absorption can rob your space of its natural liveliness, making recordings sound dull or 'dead.' It can also alter the balance of sound reflections, leading to unnatural results. The goal is to find a sweet spot: enough treatment to control echo and improve clarity, but not so much that the space loses its sense of space and dimension. Consider the tradeoffs: more panels mean better sound control but can also lead to a boxy, unnatural sound if overdone. Also, remember that treatment isn’t just about absorption; incorporating diffusers or reflective surfaces strategically can help maintain a natural sound while controlling problematic reflections.
In a typical closet, start with a handful of panels — then tweak as you listen. Always prioritize critical reflection points first, then expand if needed. The key is to listen critically and adjust based on your specific environment and recording needs.
Practical Tips for a DIY Closet Soundproofing Makeover
- Seal gaps around the door with weatherstripping or acoustic sealant.
- Hang blankets, thick curtains, or old rugs over the door and walls.
- Add rugs or carpets on the floor to absorb sound.
- Use soft furniture or clothing to soak up reflections.
- Place bass traps in corners if low-end boominess persists.
- Use mic-mounted reflection filters for quick fixes.
Simple materials like blankets and rugs can cut noise significantly. For more permanent solutions, consider adding drywall layers with damping compounds like Green Glue. Keep in mind, each of these methods has tradeoffs in effectiveness, cost, and ease of installation. Combining multiple approaches often yields the best results, but overdoing it can lead to a space that feels too 'dead' or claustrophobic. Always balance sound isolation with ventilation and comfort. Testing different configurations and listening critically will help you find the optimal setup for your specific needs.
Check out more on DIY soundproofing.
Choosing the Right Mic and Placement in a Small Closet
The microphone can make or break your recording quality in a confined space. A dynamic mic with a cardioid pattern, like the Shure SM58, naturally rejects sound from the sides and rear, helping reduce room noise. A condenser mic might pick up every echo, making the room sound worse.
Position the mic close to your mouth, about 6-12 inches, and aim it directly at you. Use a reflection filter behind the mic to block unwanted reflections. Experiment with placement until you find a sweet spot where your voice sounds full without capturing room echo.
Small, well-chosen mics can save you from over-treating your closet, especially if you combine that with strategic placement.
Learn more about mic selection at best mics for small spaces.
Remember, the right mic and placement can significantly reduce the need for extensive acoustic treatment, saving you time and money while improving your recording quality. Prioritize directional mics and close-miking techniques to capture your voice clearly and minimize room artifacts.
Frequently Asked Questions
Can a closet really become a vocal booth?
Yes, with proper treatment and ventilation, a closet can serve as a decent vocal booth for recording. Focus on reflection points, seal gaps, and add absorption to reduce echo and noise leakage.What is the main difference between sound dampening and soundproofing?
Sound dampening reduces echo and reflections inside a space, making recordings clearer. Soundproofing blocks noise from leaving or entering, preventing sound leakage through walls and gaps.Where should I place acoustic panels in a closet?
Place panels at reflection points: behind the mic, on side walls, and above your head. Bass traps go in corners if you hear low-end rumble. Use the mirror trick to identify reflection points.How much treatment coverage do I need?
Typically, treating 20–40% of the surface area at reflection points and corners yields good results. Over-treating can deaden the sound unnaturally, so prioritize strategic placement over full coverage.What’s the best way to stop sound from leaking through the door?
Seal cracks with weatherstripping or acoustic sealant. Hang blankets or heavy curtains over the door, and add draft stoppers. For serious isolation, consider a soundproof door upgrade.Conclusion
Turning a closet into a quiet, effective recording space isn’t about covering every inch with foam. It’s about smart placement, layered sound management, and ventilation. When you get those right, your tiny closet can become a surprisingly capable studio.
Remember: the goal isn’t perfect silence — it’s controlled, clear sound. So, seal gaps, position panels strategically, and keep airflow flowing. Your voice and your neighbors will thank you for it.