To save time when cleaning, start by dusting high surfaces and appliances first, so dirt doesn’t fall onto cleaned areas later. Next, wipe surfaces like counters and vanities, moving top to bottom for streak-free results. Then, vacuum or sweep floors to remove loose debris before mopping. Finish with mopping to guarantee floors are spotless and your entire routine is efficient. Keep going to discover tips that help you make your cleaning faster and less frustrating.
Key Takeaways
- Start with dusting high surfaces and appliances to prevent dirt from falling onto cleaned areas.
- Clean surfaces after dusting to remove loose debris before floor work.
- Vacuum or sweep floors after dusting to gather loose dirt and pet hair.
- Mop floors last to ensure thorough cleaning without re-soiling.
- Follow this sequence to minimize rework and complete cleaning efficiently.

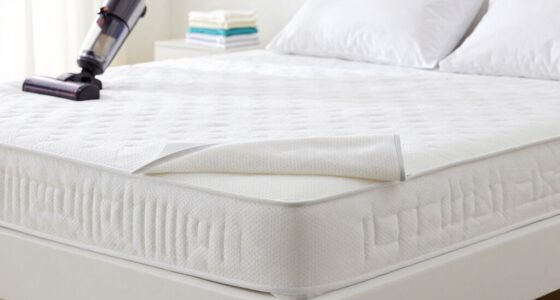
A well-organized cleaning order can substantially cut down your time spent tidying up. When you plan your cleaning routine thoughtfully, you avoid wasting effort retracing your steps or cleaning the same spot twice. One of the most effective ways to do this is by starting with dusting techniques and appliance maintenance. Dust and debris tend to settle on surfaces, so tackling these first prevents dirtying your freshly cleaned areas. By dusting high surfaces like ceiling fans, light fixtures, and shelves early on, you prevent dirt from falling onto floors or furniture you’ve yet to clean. Use a microfiber cloth or extendable duster to reach tricky spots efficiently. When dusting, pay attention to appliance maintenance as well; wiping down appliances like microwaves, refrigerators, and ovens early prevents accumulated grime from spreading elsewhere in your home. Regularly cleaning appliance exteriors reduces the need for deep scrubbing later and keeps your kitchen looking tidy.
Next, shift your focus to surfaces that collect dust and dirt, such as countertops, tables, and bathroom vanities. Cleaning these after dusting ensures that any particles knocked loose during dusting are removed, maintaining a cleaner environment overall. Use appropriate cleaning solutions suited to each surface—glass cleaners for mirrors, disinfectants for bathroom counters—and remember to wipe in a consistent, top-to-bottom motion to catch any drips or streaks. This systematic approach saves time by eliminating the need to revisit areas multiple times. Additionally, understanding the contrast ratio of your appliances or surfaces can help you identify which areas may require more thorough cleaning to achieve optimal visual clarity.
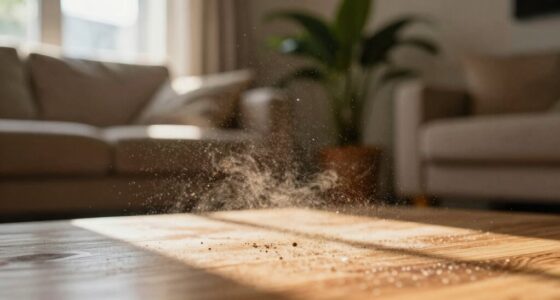
Once surfaces are tackled, move on to vacuuming or sweeping floors. Doing this after dusting ensures that loose dust and dirt are already loose and can be efficiently collected without spreading around. If you have carpets, vacuum thoroughly to remove hidden dust, pet hair, and debris. For hard floors, sweep or use a dust mop to gather dirt into a dustpan for easy disposal. This sequence prevents dirt from being pushed around or ground into carpets and tile, making your subsequent mopping or mopping unnecessary steps more effective.
Finally, mop or steam clean the floors. Since you’ve already removed surface dust and debris, this step takes less time and yields better results. Mopping after dusting and vacuuming ensures that no residual dirt remains, leaving your floors spotless. Completing your cleaning routine in this order—dusting and appliance maintenance first, then surface cleaning, followed by floor care—minimizes rework and maximizes efficiency. By sticking to this logical sequence, you’ll find yourself finishing chores faster and with less frustration, making cleaning a less formidable task.
Frequently Asked Questions
How Often Should I Change My Cleaning Routine?
You should change your cleaning routine every three to six months to keep household organization effective. Regular updates guarantee your cleaning schedule stays relevant, especially as your household changes. If you notice clutter or dirt building up faster, it’s time to revise your routine. By adjusting your cleaning schedule periodically, you maintain a tidy home and prevent chores from piling up, making cleaning more efficient and less stressful.
Can This Cleaning Sequence Work for Deep Cleaning?
Yes, this cleaning sequence works for deep cleaning, but you’ll want to adjust your cleaning schedule and increase vacuuming frequency. Start with decluttering, then dust and wipe surfaces, followed by vacuuming and mopping. If your space needs extra attention, add an extra step or extend your routine. By following this sequence, you’ll uncover hidden dirt and grime, making your deep clean more effective and less overwhelming.
Is It Effective on Different Types of Flooring?
Yes, this cleaning sequence is effective on different types of flooring materials, including hardwood, tile, laminate, and vinyl. It enhances cleaning effectiveness by systematically removing dirt and debris without damaging delicate surfaces. You’ll find it saves time because you don’t have to redo sections or use multiple products. Just adapt your cleaning tools and solutions to each flooring type, and you’ll achieve a thorough, efficient clean every time.
What Tools Are Essential for This Cleaning Order?
You need essential cleaning tools like a microfiber mop, vacuum, and scrub brushes to follow the correct cleaning order. Maintenance supplies such as all-purpose cleaner, disinfectant, and dusters are also vital. These tools help you efficiently tackle surfaces from top to bottom, ensuring thorough cleaning. Keep your supplies accessible, and use the right tools for each task to save time and achieve better results.
How Do I Adapt the Sequence for Large Spaces?
Think of your large space as a vast landscape—each area a different terrain to conquer. To adapt your cleaning sequence, start at one corner and methodically work outward, prioritizing high-traffic zones for space optimization. Use efficient tools to cover ground quickly, maintaining a steady rhythm. This approach boosts cleaning efficiency, prevents backtracking, and ensures every inch gets the attention it requires without wasting time or effort.
Conclusion
Now that you know the most efficient cleaning order, you’ll wonder why you ever cleaned any other way. By tackling surfaces from top to bottom and dirty to clean, you save time and energy. Isn’t it time you upgraded your routine and made cleaning less of a chore? With this simple change, you’ll finish faster and enjoy a cleaner space with less hassle. Why not give it a try and see the difference for yourself?